
Thanks to ALL of you for participating in our hop. And now, the winner for my candy as picked by random.org is BONNIE C. at A Scrap Above. I'll be contacting you, Bonnie, and get your candy out at the beginning of next week. Congrats!
HAPPY NEW YEAR everyone.
Friday, December 31, 2010
Tuesday, December 28, 2010
BLOG HOP - CALENDAR
Welcome to our Calendar Blog Hop! This hop will be held December 28, 29 and 30. The Grand Prize Blog Candy is a brand-new Designer’s Calendar Cartridge, donated by Karelj at One By One The Flamingos Are Stealing My Sanity. In order to be eligible to win, you need to leave a comment on each and every stop on the hop, along with a way for Karel to contact you. She will choose a winner by random.org on the 31st and announce it on her blog, as well as contacting the winner personally.
I have to admit, I love some of this My Mind's Eye paper sooooo much that it's really hard to cover it up. But what better to cover it with than with Tildas and nestabilities. I suppose we all have addictions, but two of mine are Magnolia Stamps and Nestabilities - such cute shapes!


The Tildas were colored with my copics. The dates were stamped onto a present shape cut from Joys of the Season at 1"; the "bow" on the top of each present was blinged up with Stickles. I was very, VERY excited to use the grid - it was leftover from cutting out 1 1/2 squares and I've been wanting to use it for something! The little embellishments were cut from Stretch Your Imagination and JOTS. "December" and "2011" were cut from Daisy Chain. Because I could not cut these in a shadow option, I cut them the same size, cut the little links off the solid color and laid them on top of the glittery cuts.
 For my blog hop candy, I have Perfect Pearls. I will choose the winner from the comments left under this post, using random.org, and will post the winner no later than December 31.
Just in case you get lost, here is the line-up for the hop!
1. January and April: Celeste at Touched by a Butterfly at http://touchedbyabutterfly.blogspot.com/
2. January and September: Jessica at Overjoyed Scrapper http://www.overjoyedscrapper.blogspot.com/
3. February: Christel at Scrappin' Sista http://onescrappinsista.blogspot.com/
4. February and March: Karelj at One By One The Flamingos Are Stealing My Sanity http://karelj.blogspot.com/
5. March and July: Diane at Crafting This Moment http://www.craftingthismoment.blogspot.com/
6. April: Bonnie at A Scrap Above http://ascrapabove.blogspot.com/
7. May: Michelle at Peanut Butter and Jelly Designs http://peanutbutterandjellydesigns.blogspot.com/
8. May: Natalie at Timeless Legacy Designs http://timelesslegacydesigns.blogspot.com/
9. June: Lisa at Lisa's Paper Butterflies http://lisaspaperbutterflies.blogspot.com/
10. June: Jamie at Glitter, Paper, Stamps, Oh My! http://jamieisacraftymomma.blogspot.com/
11. July: Summer and Jennifer at Cricut Diaries http://cricutdiaries.blogspot.com/
12. August: Denise at Starlight Scrapper http://starlightscrapper.blogspot.com/
13. August: Gina at Gina Thornton Stamping http://ginathorntonstamping.blogspot.com/
14. September: Deb at If It's Groovy http://ifitsgroovy.blogspot.com/
15. October: Rebecca at Creations with Becka http://www.creationswithbecka.blogspot.com/
16 . October: Lora at Notes From The Scrapbook Lady http://scrpbooklady.blogspot.com/
17. November: Belinda at Queen Bee's Musings http://www.queenbeesmusings.blogspot.com/
18. November and December : Col at Col's Creative Corner at http://www.scrappycol.blogspot.com/
19. December: Deb at Tidbit's Place http://tidbitsplace.blogspot.com/ (YOU ARE HERE)
HAVE FUN and may you all be blessed with joy and peace this New Year.
I have to admit, I love some of this My Mind's Eye paper sooooo much that it's really hard to cover it up. But what better to cover it with than with Tildas and nestabilities. I suppose we all have addictions, but two of mine are Magnolia Stamps and Nestabilities - such cute shapes!


The Tildas were colored with my copics. The dates were stamped onto a present shape cut from Joys of the Season at 1"; the "bow" on the top of each present was blinged up with Stickles. I was very, VERY excited to use the grid - it was leftover from cutting out 1 1/2 squares and I've been wanting to use it for something! The little embellishments were cut from Stretch Your Imagination and JOTS. "December" and "2011" were cut from Daisy Chain. Because I could not cut these in a shadow option, I cut them the same size, cut the little links off the solid color and laid them on top of the glittery cuts.

Just in case you get lost, here is the line-up for the hop!
1. January and April: Celeste at Touched by a Butterfly at http://touchedbyabutterfly.blogspot.com/
2. January and September: Jessica at Overjoyed Scrapper http://www.overjoyedscrapper.blogspot.com/
3. February: Christel at Scrappin' Sista http://onescrappinsista.blogspot.com/
4. February and March: Karelj at One By One The Flamingos Are Stealing My Sanity http://karelj.blogspot.com/
5. March and July: Diane at Crafting This Moment http://www.craftingthismoment.blogspot.com/
6. April: Bonnie at A Scrap Above http://ascrapabove.blogspot.com/
7. May: Michelle at Peanut Butter and Jelly Designs http://peanutbutterandjellydesigns.blogspot.com/
8. May: Natalie at Timeless Legacy Designs http://timelesslegacydesigns.blogspot.com/
9. June: Lisa at Lisa's Paper Butterflies http://lisaspaperbutterflies.blogspot.com/
10. June: Jamie at Glitter, Paper, Stamps, Oh My! http://jamieisacraftymomma.blogspot.com/
11. July: Summer and Jennifer at Cricut Diaries http://cricutdiaries.blogspot.com/
12. August: Denise at Starlight Scrapper http://starlightscrapper.blogspot.com/
13. August: Gina at Gina Thornton Stamping http://ginathorntonstamping.blogspot.com/
14. September: Deb at If It's Groovy http://ifitsgroovy.blogspot.com/
15. October: Rebecca at Creations with Becka http://www.creationswithbecka.blogspot.com/
16 . October: Lora at Notes From The Scrapbook Lady http://scrpbooklady.blogspot.com/
17. November: Belinda at Queen Bee's Musings http://www.queenbeesmusings.blogspot.com/
18. November and December : Col at Col's Creative Corner at http://www.scrappycol.blogspot.com/
19. December: Deb at Tidbit's Place http://tidbitsplace.blogspot.com/ (YOU ARE HERE)
HAVE FUN and may you all be blessed with joy and peace this New Year.
Sunday, December 26, 2010
HAPPY HOLIDAYS

Happy Holidays to All! We here in California have had lots and lots of rain - even here in the desert. But we were lucky to have a warm and sunny Christmas Day and spent a lot of time outside. Here is a picture of my son, Brian, and grandson, Tommy.
Cheers!
Tuesday, December 21, 2010
MY FAVORITE PRESENT
Last present done! woo-hoo. Baking and cleaning tomorrow and airport run the next day! I decided to make my son a sort of "memory book" for his Christmas present. I bought a nice leather binder and made these dividers. I've been writing things down - family lore, memories, etc. and will print it up, put in the binder, and give to him for Christmas. I think it's a special present that he will love. The best part is I can keep adding to it as time goes on.


 I kept the divider pages fairly simple and masculine, with the exception of this one, of course. I decided that on this divider (since I'm talking about dishes, etc.) that I would add a little bit of "mom" to it. Thus, the coffee cup colored with my copics. Nothing spells "mom" more than my stamps and copics!


 I kept the divider pages fairly simple and masculine, with the exception of this one, of course. I decided that on this divider (since I'm talking about dishes, etc.) that I would add a little bit of "mom" to it. Thus, the coffee cup colored with my copics. Nothing spells "mom" more than my stamps and copics!
Saturday, December 18, 2010
Silver Trays - Times Two!
OK, I admit it. Add altering silver trays to my list of addiction. I picked these two trays up at a thrift store last weekend. I made them for part of my DILs' presents for Christmas. I think these are just silverplated trays and they didn't have the "vintage" look I was going for. I tried rubbing some black patina around the edges - the patina was left over from my stained glass days - and it gave me the older look I was going for.
Used more gorgeous Graphic 45 and Bo Bunny paper (I have a hard time covering up this paper - it is just too cute), TH's rosettes, prima flowers and leaves, nestabilities dies, and stuff from my stash pile. The reindeer are from JOTS.


Used more gorgeous Graphic 45 and Bo Bunny paper (I have a hard time covering up this paper - it is just too cute), TH's rosettes, prima flowers and leaves, nestabilities dies, and stuff from my stash pile. The reindeer are from JOTS.


Monday, December 13, 2010
GIFT CARD HOLDER
I'm not sure how much I like giving gift cards for presents, but with 3 grown kids it turns out to be the best option! I decided to make some cute little card holders. I basically started with the idea of an envelope and blinged it up. I took pictures as I made it, so you can see the steps.
First of all the finished project:
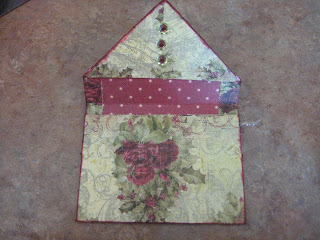


To make this, I used double-sided paper so the inside would be finished looking. The paper used is Iron Orchid Designs from Creative Imaginations
The paper size was 8 1/4 x 5. I scored 1/2" in on both of the long sides, and used my ATG to glue down. I scored 5 3/4" from the bottom of the paper, creased well with my bone folder and then ran the ATG down the sides on the piece to be folded up, as close to the outside edge as possible (to give more room on the inside of the holder).


First of all the finished project:
Envelope with card slipping inside:
To make this, I used double-sided paper so the inside would be finished looking. The paper used is Iron Orchid Designs from Creative Imaginations
The paper size was 8 1/4 x 5. I scored 1/2" in on both of the long sides, and used my ATG to glue down. I scored 5 3/4" from the bottom of the paper, creased well with my bone folder and then ran the ATG down the sides on the piece to be folded up, as close to the outside edge as possible (to give more room on the inside of the holder).
I folded the top of the card like this:
and then glued it down, also with my ATG.
One more score line to fold the top over and it's done.
To bling it up a little, I inked the edges, put green sticky crystals on the seam of the top inside, and used ribbon from my stash to keep it closed. The bling design on the front of the holder is from
Basic Gray.
Wednesday, December 8, 2010
One present down....


The paper is wonderful Graphic 45 Christmas past, and if you look closely I've got some Tim Holtz tissue tape on it.
Tuesday, December 7, 2010
Metal Christmas Trays
Finally some time to play and post. These are some small trays which I bought several months ago from a thrift store. I just knew I'd be able to do something with them. I recently saw a couple of pictures of altered vintage trays, so I just had to try these. I think they are cute -- my biggest problem know is deciding whether I keep for myself or use as a present!
The trays were covered with a vintage-inspired paper from BoBunny. It was so cute, I had a hard time covering it up!


The trays were covered with a vintage-inspired paper from BoBunny. It was so cute, I had a hard time covering it up!


This tray was embellished with a prima flower and leaves, scrap ribbon, an apple tree ornament, and TimHoltz clock hand. The clock face was a scrap from my husband's stash of watch parts. The red flourish was from my stash - it was white and I used a copic marker to color; I liked the way the marker did not cover it evenly - there are streaks of darker colors thru it.

This tray was embellished using lace ribbon - I stitched along one side of the ribbon and then pulled it into a circle, glued and embellished with golden colored gems, scrap lace, and a string of pearls. The green flower is from my stash, and the keyhole and key are from Tim Holtz.

This tray was fun to decorate. The larger cream rosette was cut from Tim Holtz's rosette die, and then embellished with a button. "Dec 25" is from some loose stickers in my stash, as were the hearts and charm. The package in the lower left corner is a button. The tiny rosette was a strip cut 12" x 1" and scored on my MS score board every 1/4". Then folded mountain-valley and gathered into a circle and embellished with another loose charm.

This tray has yellow ribbon from my stash and buttons which I absolutely love and had a hard time using (!) were from a thrift store. The snowflake in between the button is from a MS punch, inked with brown ink. The bottom right corner is an ornament from M's which I took apart and using my imagination I'm calling them "sugar plums" to match the paper!
THANKS FOR THE COMMENTS - someone asked the size of the trays. They are 3 x 6 - I've been told they might be vintage appetizer plates. They were stamped with a fruit design which I hated to cover up, but just couldn't decide what to do with them. I don't think I would have felt comfortable putting food directly on them, so I like them this way!
THANKS FOR THE COMMENTS - someone asked the size of the trays. They are 3 x 6 - I've been told they might be vintage appetizer plates. They were stamped with a fruit design which I hated to cover up, but just couldn't decide what to do with them. I don't think I would have felt comfortable putting food directly on them, so I like them this way!
Fleur de Lis Ornaments
These Fleur de Lis Ornaments were made using the shapeabilities die. I got the directions for this from here and then changed them a little. I found it easier to cut the burgundy paper an extra time and then glue it together on the white paper. I added stickles to the ribbon spool and obviously used different brads in the center. They are reallly pretty and as much as I hate to admit it, really easy. Try them!


Tags
I think tags are one of my most favorite things!! Love tags.


Frosty kisses was cut and shadowed from the Cricut Winter Woodland carts; the blue background was run thru my cuttlebug.

This tag was cut and shadowed from the Cricut cart A Child's Year - everything on that cart is just so sweet.
House Mouse Christmas Card


A buddy of mine sent me this cute little House Mouse stamp (thank you Lisa!!) and it makes just the cutest card. I colored with my copics, used prima flowers and wreaths from my stash. I inked around the inside of the card with an Ink Dot. Seasons Greetings was cut from the Cricut cart Winter Woodland.
Gruffies Christmas Card

I just love these little guys. This was colored with copics; the blingy tree on the right is from Basic Grey. There is lace from my stash, and the remainder of the embellishments are just cut from leftover Christmas paper.
Tilda Christmas Card
More Christmas Cards!


On this card, I used a MS punch for the snowflakes and silver smooch on the poinsettias Tilda is holding. I'm afraid the silvery smooch doesn't show up well on the picture. This was my first time using Smooch and I love it. It is a sharp silver that really stands out. The remainder of the card was colored with copics.
Christmas Cards
Finally, I've been able to start on my Christmas cards. Well, I only have one done, but that's a start, right?


I used the wonderful Graphic 45 Christmas Past paper for the front of the card. I kept it fairly simple because the paper is so pretty. I made the rosette and it has a button in the middle of it.

Monday, December 6, 2010
GIBBS 5
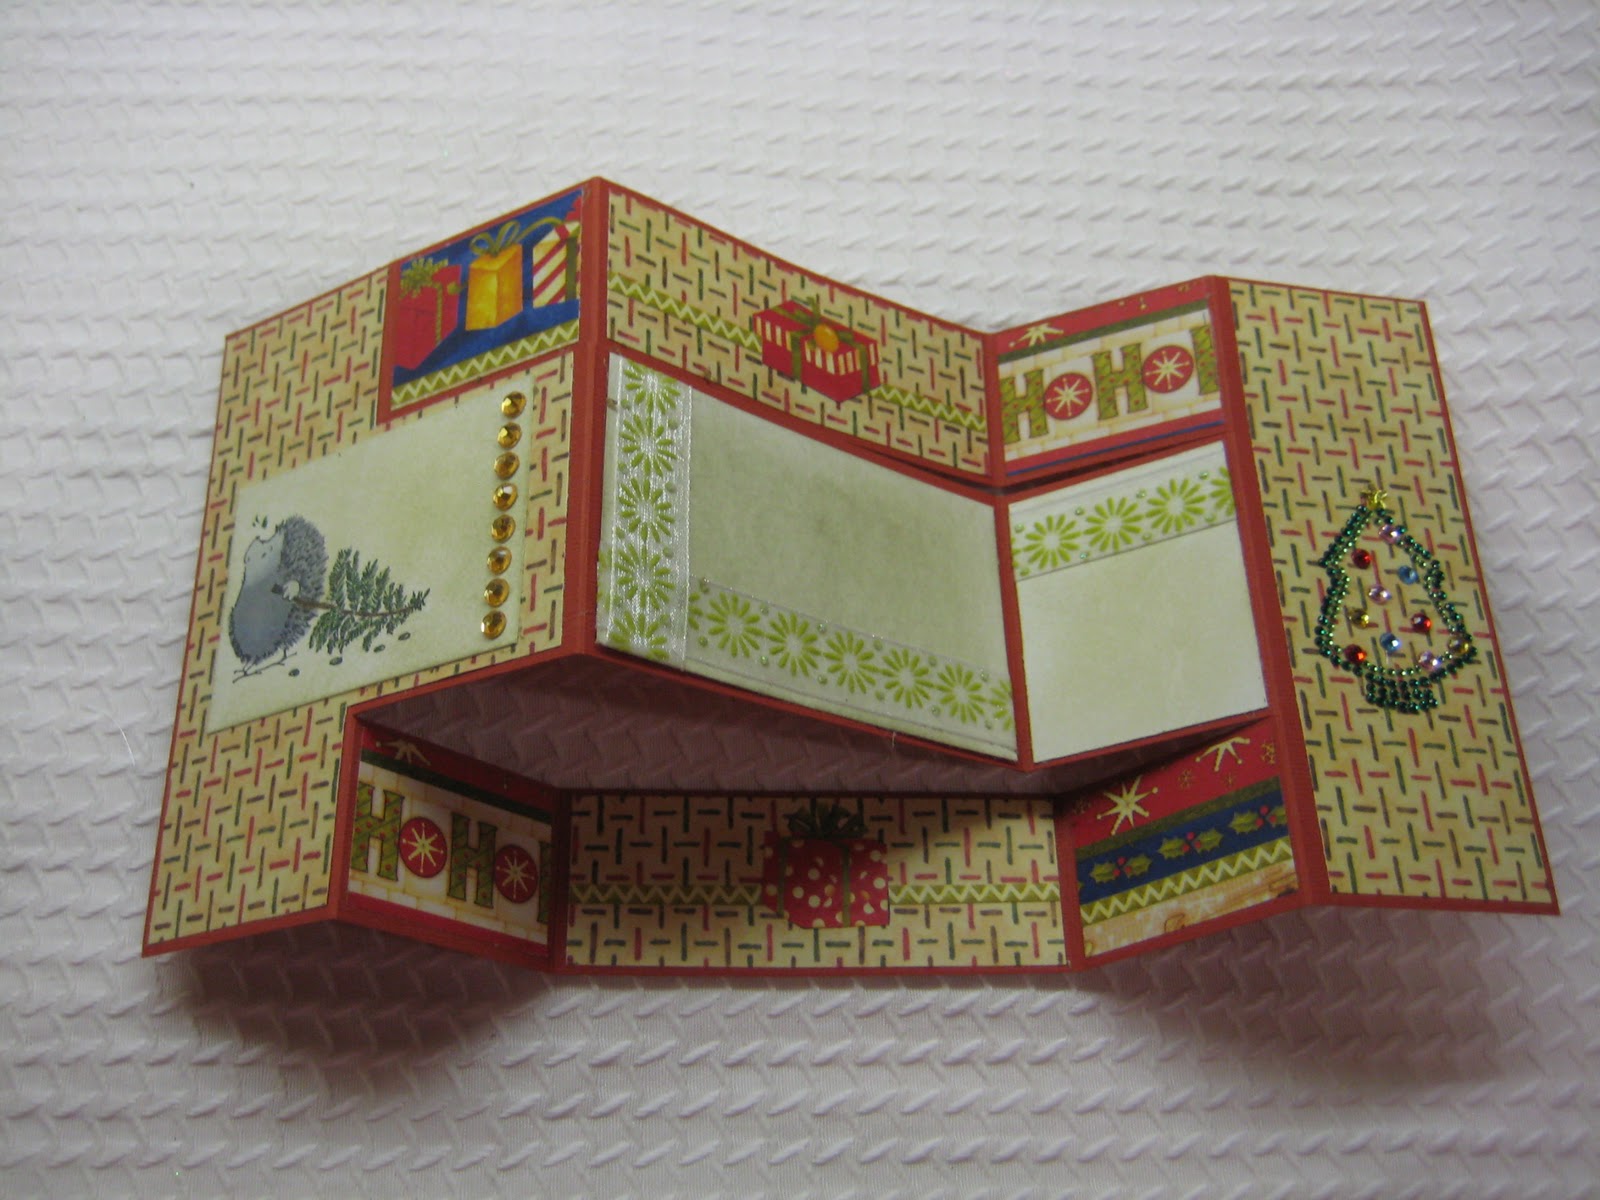
My box to my partner in the Cricut GIBBS 5 swap has reached her, so I can now post some of her goodies.
Phew - this is a long post! Be patient with me!


Phew - this is a long post! Be patient with me!

Rosette - another TH die; the title was printed from my computer, and the snowflake punch is MS.

It's very hard to explain this technique. I'm making another one for my niece's new baby (due to arrive any day!) and I will take pictures as I put it together - it will be easier that way. In the meantime, I'll try to explain. I tore out a page, then gathered 5-6 pages still in the book together and glued them together by taking the torn out page and pasting over the edges of the 5-6 pages. I used Yes Paste and it worked wonderfully.

I printed out the poem "Twas the Night Before Christmas" and mounted it on paper with torn edges. The reindeer were cut on my Cricut with the Joys of the Season cart.

The remainder of the poem printed out - on torn paper. The flowers and leaves are prima.

I used stickers from my stash for this page; I also machine stitched in a zig zag pattern around the picture boxes.

"Tis the Season" stamped on the bottom. Snowflakes were punch from a MS punch.

I loved this vintage looking paper and just didn't want to cover it up. I used a pre-made rosette from my stach and cut the scalloped circle with a nestabilities die run thru my cuttlebug.

These boxes were decorated with scrap ribbon. I also put red dots around the sides of all the squares.

This is another sheet of paper that I didn't want to cover too much. The ribbon is from WM and I love it - delicate and very pretty.

Embellishment from my stash, and edges inked and layered paper.

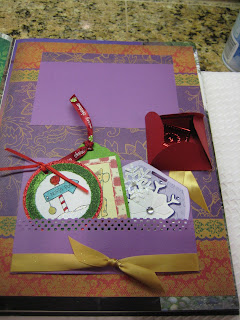
This page has a pocket for various Christmas tags. The purple block is punched with a MS stamp.

This is just a really pretty piece of paper decorated with "falala" which was purchased at Michael's last year.

Another page that I left pretty much the way it was. The scallop cut from the nestabilities die run thru my cuttlebug again, and the sparkly green circle frame is from Making Memories.


Subscribe to:
Comments (Atom)


