About Me

Florence, Arizona
Welcome to my blog. I am newly retired and eager to enjoy it all - decorating, shopping, cooking, travel and most crafts - paper crafts, stained glass, mosaic, mixed media, sketching, painting - you name it, I want to try it.
Powered by Blogger.

Wednesday, January 5, 2011

BABY ALBUM

OK, be patient with me!!  This will be lots of pics ... My niece is having a baby girl - TODAY - I got up to a message that she is in labor and about ready to deliver.  And I just finished her book yesterday!  She is the sweetest person in the world and has had such a hard time carrying a pregnancy to full term, so this new little baby girl is sooooo loved already! 
For this album, I took a book of nursery rhymes and altered it.  I left the cover as it was cuz I liked it.  I tore out quite a few pages, then glued some together.  I ran a line of glue with my hot glue gun, then folded the two pages together - this helps the book stay together.  Then I bunched up about 10 pages and put them together by gluing one of the pages that I had torn out back on the pages -- very hard to explain, really easy to do -- hopefully the pics will explain!


This phrase was cut from the Heritage cart, and of course stickled!!


I love tags and use them wherever possible.  I made some of these, and some I received in swaps.

Oval scallop cut with nestability die
Birdhouse cut from SYI, rosette cut with TH rosette die


Both picture mats were edged with MS punches; prima butterflies


The butterfly borders cut from Paper Pups and stickled!

baby prima flowers!


Friday, December 31, 2010

BLOG CANDY!!

Thanks to ALL of you for participating in our hop.  And now, the winner for my candy as picked by random.org is BONNIE C. at A Scrap Above.  I'll be contacting you, Bonnie, and get your candy out at the beginning of next week.  Congrats!

HAPPY NEW YEAR everyone.

Tuesday, December 28, 2010

BLOG HOP - CALENDAR

Welcome to our Calendar Blog Hop!  This hop will be held December 28, 29 and 30. The Grand Prize Blog Candy is a brand-new Designer’s Calendar Cartridge, donated by Karelj at One By One The Flamingos Are Stealing My Sanity. In order to be eligible to win, you need to leave a comment on each and every stop on the hop, along with a way for Karel to contact you. She will choose a winner by random.org on the 31st and announce it on her blog, as well as contacting the winner personally. 
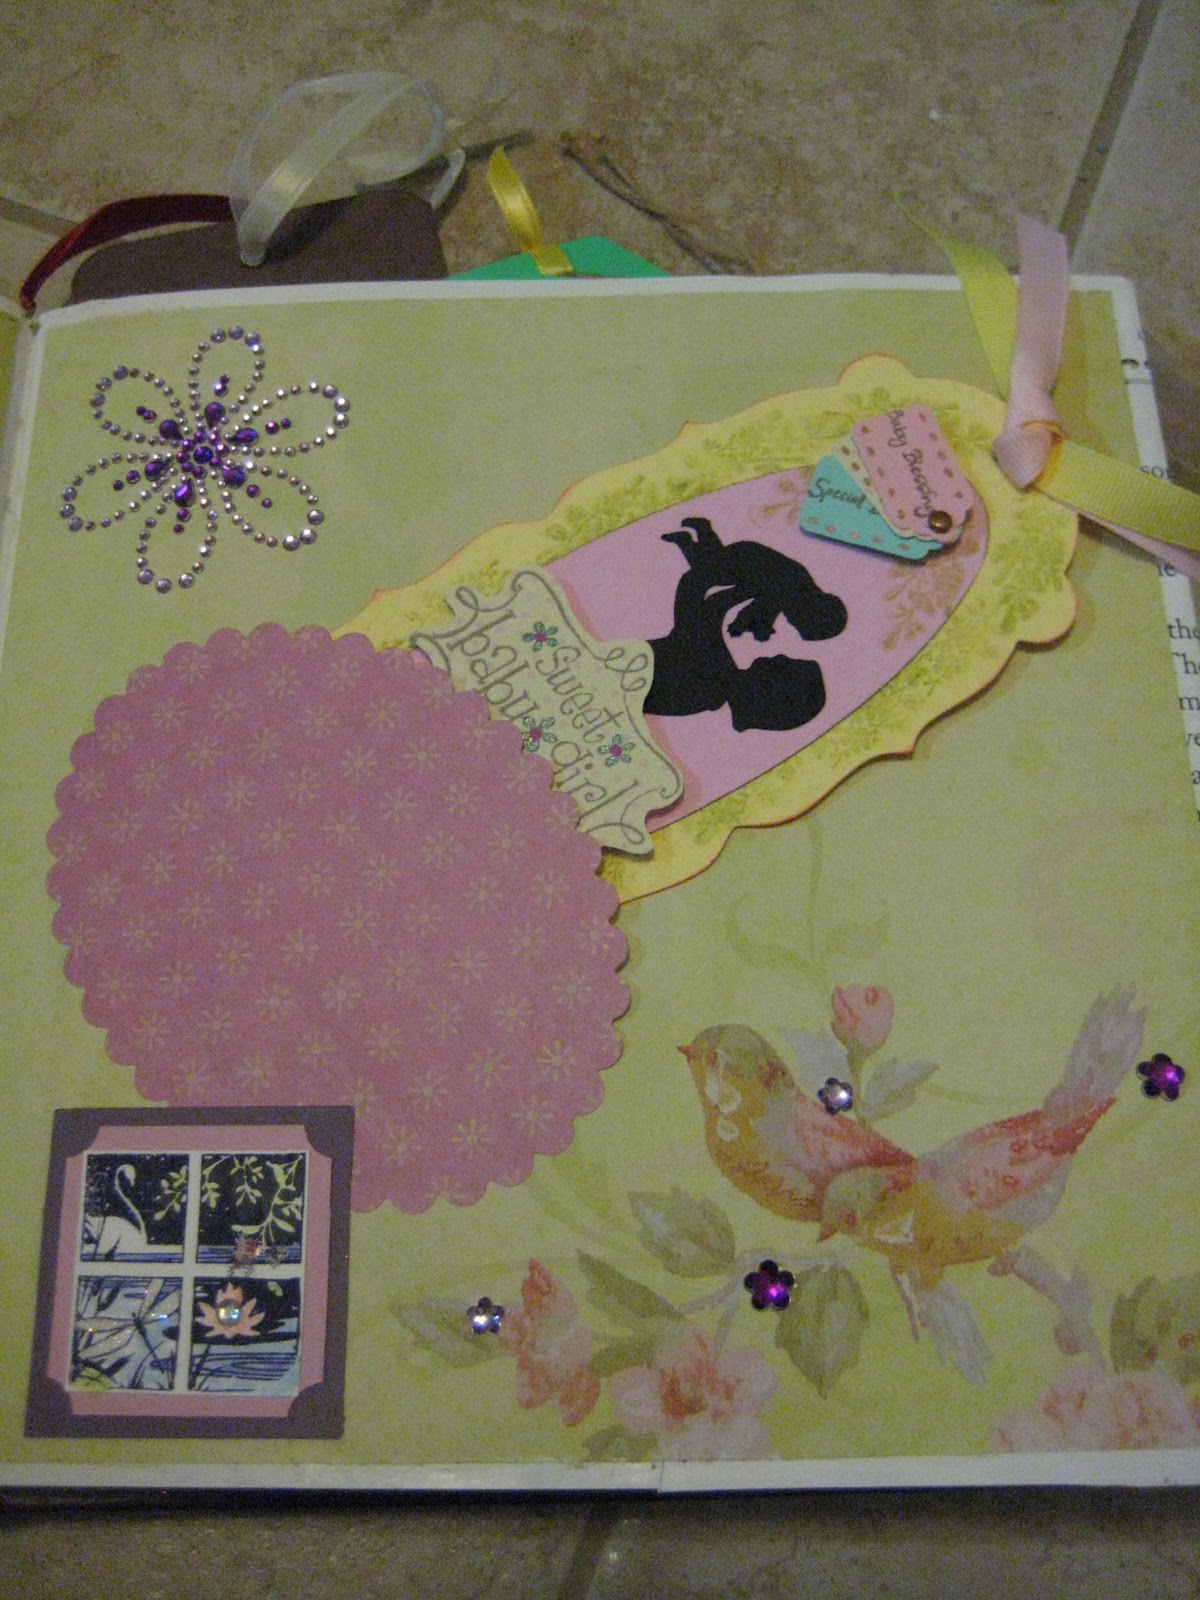
I have to admit, I love some of this My Mind's Eye paper sooooo much that it's really hard to cover it up.  But what better to cover it with than with Tildas and nestabilities.  I suppose we all have addictions, but two of mine are Magnolia Stamps and Nestabilities - such cute shapes!


The Tildas were colored with my copics.  The dates were stamped onto a present shape cut from Joys of the Season at 1"; the "bow" on the top of each present was blinged up with Stickles.  I was very, VERY excited to use the grid - it was leftover from cutting out 1 1/2 squares and I've been wanting to use it for something!  The little embellishments were cut from Stretch Your Imagination and JOTS.  "December" and "2011" were cut from Daisy Chain.   Because I could not cut these in a shadow option, I cut them the same size, cut  the little links off the solid color and laid them on top of the glittery cuts. 

For my blog hop candy, I have Perfect Pearls.  I will choose the winner from the comments left under this post, using random.org, and will post the winner no later than December 31.

Just in case you get lost, here is the line-up for the hop!

1. January and April: Celeste at Touched by a Butterfly at http://touchedbyabutterfly.blogspot.com/
2. January and September: Jessica at Overjoyed Scrapper http://www.overjoyedscrapper.blogspot.com/
3. February: Christel at Scrappin' Sista http://onescrappinsista.blogspot.com/
4. February and March: Karelj at One By One The Flamingos Are Stealing My Sanity http://karelj.blogspot.com/
5. March and July: Diane at Crafting This Moment  http://www.craftingthismoment.blogspot.com/
6. April:  Bonnie at A Scrap Above  http://ascrapabove.blogspot.com/ 
7. May: Michelle at Peanut Butter and Jelly Designs  http://peanutbutterandjellydesigns.blogspot.com/
8. May: Natalie at Timeless Legacy Designs http://timelesslegacydesigns.blogspot.com/
9. June: Lisa at Lisa's Paper Butterflies http://lisaspaperbutterflies.blogspot.com/
10. June: Jamie at Glitter, Paper, Stamps, Oh My! http://jamieisacraftymomma.blogspot.com/
11. July: Summer and Jennifer at Cricut Diaries http://cricutdiaries.blogspot.com/
12. August: Denise at Starlight Scrapper http://starlightscrapper.blogspot.com/
13. August: Gina at Gina Thornton Stamping http://ginathorntonstamping.blogspot.com/
14. September: Deb at If It's Groovy http://ifitsgroovy.blogspot.com/
15. October: Rebecca at Creations with Becka http://www.creationswithbecka.blogspot.com/
16 . October: Lora at Notes From The Scrapbook Lady http://scrpbooklady.blogspot.com/
17. November: Belinda at Queen Bee's Musings http://www.queenbeesmusings.blogspot.com/
18. November and December : Col at Col's Creative Corner at http://www.scrappycol.blogspot.com/
19. December: Deb at Tidbit's Place http://tidbitsplace.blogspot.com/ (YOU ARE HERE)

HAVE FUN and may you all be blessed with joy and peace this New Year.

Sunday, December 26, 2010

HAPPY HOLIDAYS


Happy Holidays to All!  We here in California have had lots and lots of rain - even here in the desert.  But we were lucky to have a warm and sunny Christmas Day and spent a lot of time outside.  Here is a picture of my son, Brian, and grandson, Tommy.
Cheers!

Tuesday, December 21, 2010

MY FAVORITE PRESENT

Last present done! woo-hoo. Baking and cleaning tomorrow and airport run the next day! I decided to make my son a sort of "memory book" for his Christmas present. I bought a nice leather binder and made these dividers. I've been writing things down - family lore, memories, etc. and will print it up, put in the binder, and give to him for Christmas. I think it's a special present that he will love. The best part is I can keep adding to it as time goes on.
I kept the divider pages fairly simple and masculine, with the exception of this one, of course.  I decided that on this divider (since I'm talking about dishes, etc.) that I would add a little bit of "mom" to it.  Thus, the coffee cup colored with my copics.  Nothing spells "mom" more than my stamps and copics!

Saturday, December 18, 2010

Silver Trays - Times Two!

OK, I admit it.  Add altering silver trays to my list of addiction.  I picked these two trays up at a thrift store last weekend.  I made them for part of my DILs' presents for Christmas.  I think these are just silverplated trays and they didn't have the "vintage" look I was going for.  I tried rubbing some black patina around the edges - the patina was left over from my stained glass days - and it gave me the older look I was going for. 
Used more gorgeous Graphic 45 and Bo Bunny paper (I have a hard time covering up this paper - it is just too cute), TH's rosettes, prima flowers and leaves, nestabilities dies, and stuff from my stash pile.   The reindeer are from JOTS.


Monday, December 13, 2010

GIFT CARD HOLDER

I'm not sure how much I like giving gift cards for presents, but with 3 grown kids it turns out to be the best option!  I decided to make some cute little card holders.  I basically started with the idea of an envelope and blinged it up.  I took pictures as I made it, so you can see the steps.
First of all the finished project:


Envelope with card slipping inside:


To make this, I used double-sided paper so the inside would be finished looking.  The paper used is Iron Orchid Designs from Creative Imaginations

The paper size was 8 1/4 x 5.  I scored 1/2" in on both of the long sides, and used my ATG to glue down.  I scored 5 3/4" from the bottom of the paper, creased well with my bone folder and then ran the ATG down the sides on the piece to be folded up, as close to the outside edge as possible (to give more room on the inside of the holder). 

I folded the top of the card like this:
and then glued it down, also with my ATG.
One more score line to fold the top over and it's done. 

To bling it up a little, I inked the edges, put green sticky crystals on the seam of the top inside, and used ribbon from my stash to keep it closed.  The bling design on the front of the holder is from
 Basic Gray.